A new month, a new beginning
It would have been nicer if I’m posting pictures of something I cooked or baked today as my opening salvo for the month. But it’s been a busy day at work and when I got home, I just didn’t have the energy for any kitchen activity. I kinda like my title though because I want to start the new month right. A new beginning- hopefully new adventures and more inspiration in the kitchen.
The weekend had been productive though and since I was home yesterday, I cooked a couple of dishes. I made Halibut in Spicy-Sweet & Sour Sauce, did my first Buco-Pandan Salad, my first Ube Cheesecake and Spaghetti for dinner.
I’m not really fond of sweet dishes. I would just limit or categorize sweet to desserts and the only sweet dish I can eat other than desserts is fried fish with sweet and sour sauce and it has to be spicy as well to sort of mask the sweetness. I love using spicy ketchup and chili flakes for the added punch. So I fried the halibut which I bought from the fish market. Halibut is just perfect for the recipe because of its firm meat. It is actually sweet when fresh just like other seafoods.
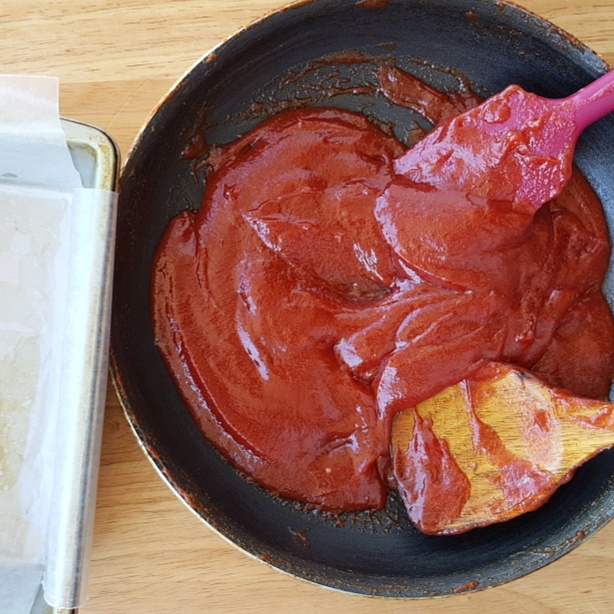
I just seasoned the fish with salt and pepper, sprinkled flour and cornstarch mixture for crunch before deep frying. Then I made the sauce by boiling water with spicy ketchup, chili flakes, white vinegar and brown sugar. I used a little cornstarch dissolved in a little water to thicken the sauce. The addition of bell peppers, red onion and cilantro gave the dish more flavors. Fresh catch plus fresh produce equals an amazing dish, all the time.


.JPG)
 Finally, I made my Buco-Pandan Salad for the first time. I have really nice flavors mingling together using cream, young coconut, condensed milk, tapioca pearls, sugar and pandan-flavored gelatin bars. I know I can take it up another notch by using better, more tender young coconut meat and I will definitely use Knox next time so I’ll have the best gelatin texture. Obviously, I’m not really happy with my choice of gelatin bars and shredded young coconut but the addition of tapioca pearls and the overall taste saved my salad.


And now ... presenting ...
Drum roll ...
My First Ever Ube Cheesecake
It was a spur of the moment thingy. I was looking at my new stash of flavorings and thought I should do something purple. Well there’s so much I can make using the ube flavoring I have but watching Sunny Anderson make her Lone Star Cheesecake, I suddenly had a craving for it. But I don’t want anything with berries. I want something I haven’t done before. Ube Cheesecake! And initially, I was thinking ube cheesecake with mango mousse topping. But I ran out of fresh mangoes. So that will be another recipe and another post. Anyway, it is a very simple cheesecake but rich in ube flavor. I just love it but it disappeared so fast I wasn’t able to take a picture of the whole cake. Maybe this will be a new beginning to my baking journey; a cheesecake series perhaps?


Ube Cheesecake
Ingredients:
Crust:
2 cups Graham crumbs
6 tbsp melted unsalted butter
Filling:
4 pkg cups softened cream cheese
1 1/4 cups granulated sugar
4 extra large eggs
2 tbsp ube flavoring (or more)
2 tsp pure vanilla extract
Directions:
1. Pre-heat oven to 325 degrees.
2. Pulse the graham crumbs and melted butter in a food processor. Press into a spring form pan evenly to the bottom and a little bit to the sides. Set aside.
3. Using a stand up mixer, cream softened cream cheese and sugar till smooth for about 5 minutes.
4. Add the eggs one at a time and continue beating.
5. Add the ube flavoring and vanilla extract and continue beating. Continue mixing till creamy and silky for about an additional 3 minutes.
6. Pour into prepared pan and bake for an hour.
7. Turn off the oven but leave the cake inside till the oven cools down. (I recommend placing a foil over the cake so it doesn't dry.)
8. Cool completely before chilling in the fridge before serving.
* Note: It helps if you bake your cake in a bain marie or water bath to avoid cracks. Just place the cheesecake in the middle of a baking sheet and pour boiled water around the edges.
As a recap, I made my Corned Beef Spaghetti for dinner. I love adding cream cheese and grated parmesan to this spaghetti variety. And this brand of corned beef is tops on my list. I always make it a point to have some in my pantry.

The weekend had been productive though and since I was home yesterday, I cooked a couple of dishes. I made Halibut in Spicy-Sweet & Sour Sauce, did my first Buco-Pandan Salad, my first Ube Cheesecake and Spaghetti for dinner.
I’m not really fond of sweet dishes. I would just limit or categorize sweet to desserts and the only sweet dish I can eat other than desserts is fried fish with sweet and sour sauce and it has to be spicy as well to sort of mask the sweetness. I love using spicy ketchup and chili flakes for the added punch. So I fried the halibut which I bought from the fish market. Halibut is just perfect for the recipe because of its firm meat. It is actually sweet when fresh just like other seafoods.
I just seasoned the fish with salt and pepper, sprinkled flour and cornstarch mixture for crunch before deep frying. Then I made the sauce by boiling water with spicy ketchup, chili flakes, white vinegar and brown sugar. I used a little cornstarch dissolved in a little water to thicken the sauce. The addition of bell peppers, red onion and cilantro gave the dish more flavors. Fresh catch plus fresh produce equals an amazing dish, all the time.
Finally, I made my Buco-Pandan Salad for the first time. I have really nice flavors mingling together using cream, young coconut, condensed milk, tapioca pearls, sugar and pandan-flavored gelatin bars. I know I can take it up another notch by using better, more tender young coconut meat and I will definitely use Knox next time so I’ll have the best gelatin texture. Obviously, I’m not really happy with my choice of gelatin bars and shredded young coconut but the addition of tapioca pearls and the overall taste saved my salad.And now ... presenting ...
Drum roll ...
My First Ever Ube Cheesecake
It was a spur of the moment thingy. I was looking at my new stash of flavorings and thought I should do something purple. Well there’s so much I can make using the ube flavoring I have but watching Sunny Anderson make her Lone Star Cheesecake, I suddenly had a craving for it. But I don’t want anything with berries. I want something I haven’t done before. Ube Cheesecake! And initially, I was thinking ube cheesecake with mango mousse topping. But I ran out of fresh mangoes. So that will be another recipe and another post. Anyway, it is a very simple cheesecake but rich in ube flavor. I just love it but it disappeared so fast I wasn’t able to take a picture of the whole cake. Maybe this will be a new beginning to my baking journey; a cheesecake series perhaps?
Ube Cheesecake
Ingredients:
Crust:
2 cups Graham crumbs
6 tbsp melted unsalted butter
Filling:
4 pkg cups softened cream cheese
1 1/4 cups granulated sugar
4 extra large eggs
2 tbsp ube flavoring (or more)
2 tsp pure vanilla extract
Directions:
1. Pre-heat oven to 325 degrees.
2. Pulse the graham crumbs and melted butter in a food processor. Press into a spring form pan evenly to the bottom and a little bit to the sides. Set aside.
3. Using a stand up mixer, cream softened cream cheese and sugar till smooth for about 5 minutes.
4. Add the eggs one at a time and continue beating.
5. Add the ube flavoring and vanilla extract and continue beating. Continue mixing till creamy and silky for about an additional 3 minutes.
6. Pour into prepared pan and bake for an hour.
7. Turn off the oven but leave the cake inside till the oven cools down. (I recommend placing a foil over the cake so it doesn't dry.)
8. Cool completely before chilling in the fridge before serving.
* Note: It helps if you bake your cake in a bain marie or water bath to avoid cracks. Just place the cheesecake in the middle of a baking sheet and pour boiled water around the edges.
As a recap, I made my Corned Beef Spaghetti for dinner. I love adding cream cheese and grated parmesan to this spaghetti variety. And this brand of corned beef is tops on my list. I always make it a point to have some in my pantry.

Comments
Post a Comment